Intro
This is a walk-through guide of how I set up home network and how to set up VLANs on a TP-Link Managed Switch.
My network at home is set into 3 Virtual Local Area Networks (VLAN). The first is VLAN 1, and it is the default network that my family’s everyday devices connect to. The second is VLAN 20. It is for smart devices that have questionable security vulnerabilities. I buy devices that I generally trust, but you can’t be too careful. Plus, this was a good way to help me understand VLANs a bit more. The third one is VLAN 30, and it is for my home lab devices. This way, I can make router, firewall, DNS, and other changes without interrupting anyone’s network connectivity.
PFSense - Create VLAN
- Log into your PFSense Router/Firewall
- Navigate to Interfaces -> Assignments
- Select VLANs -> Add
!

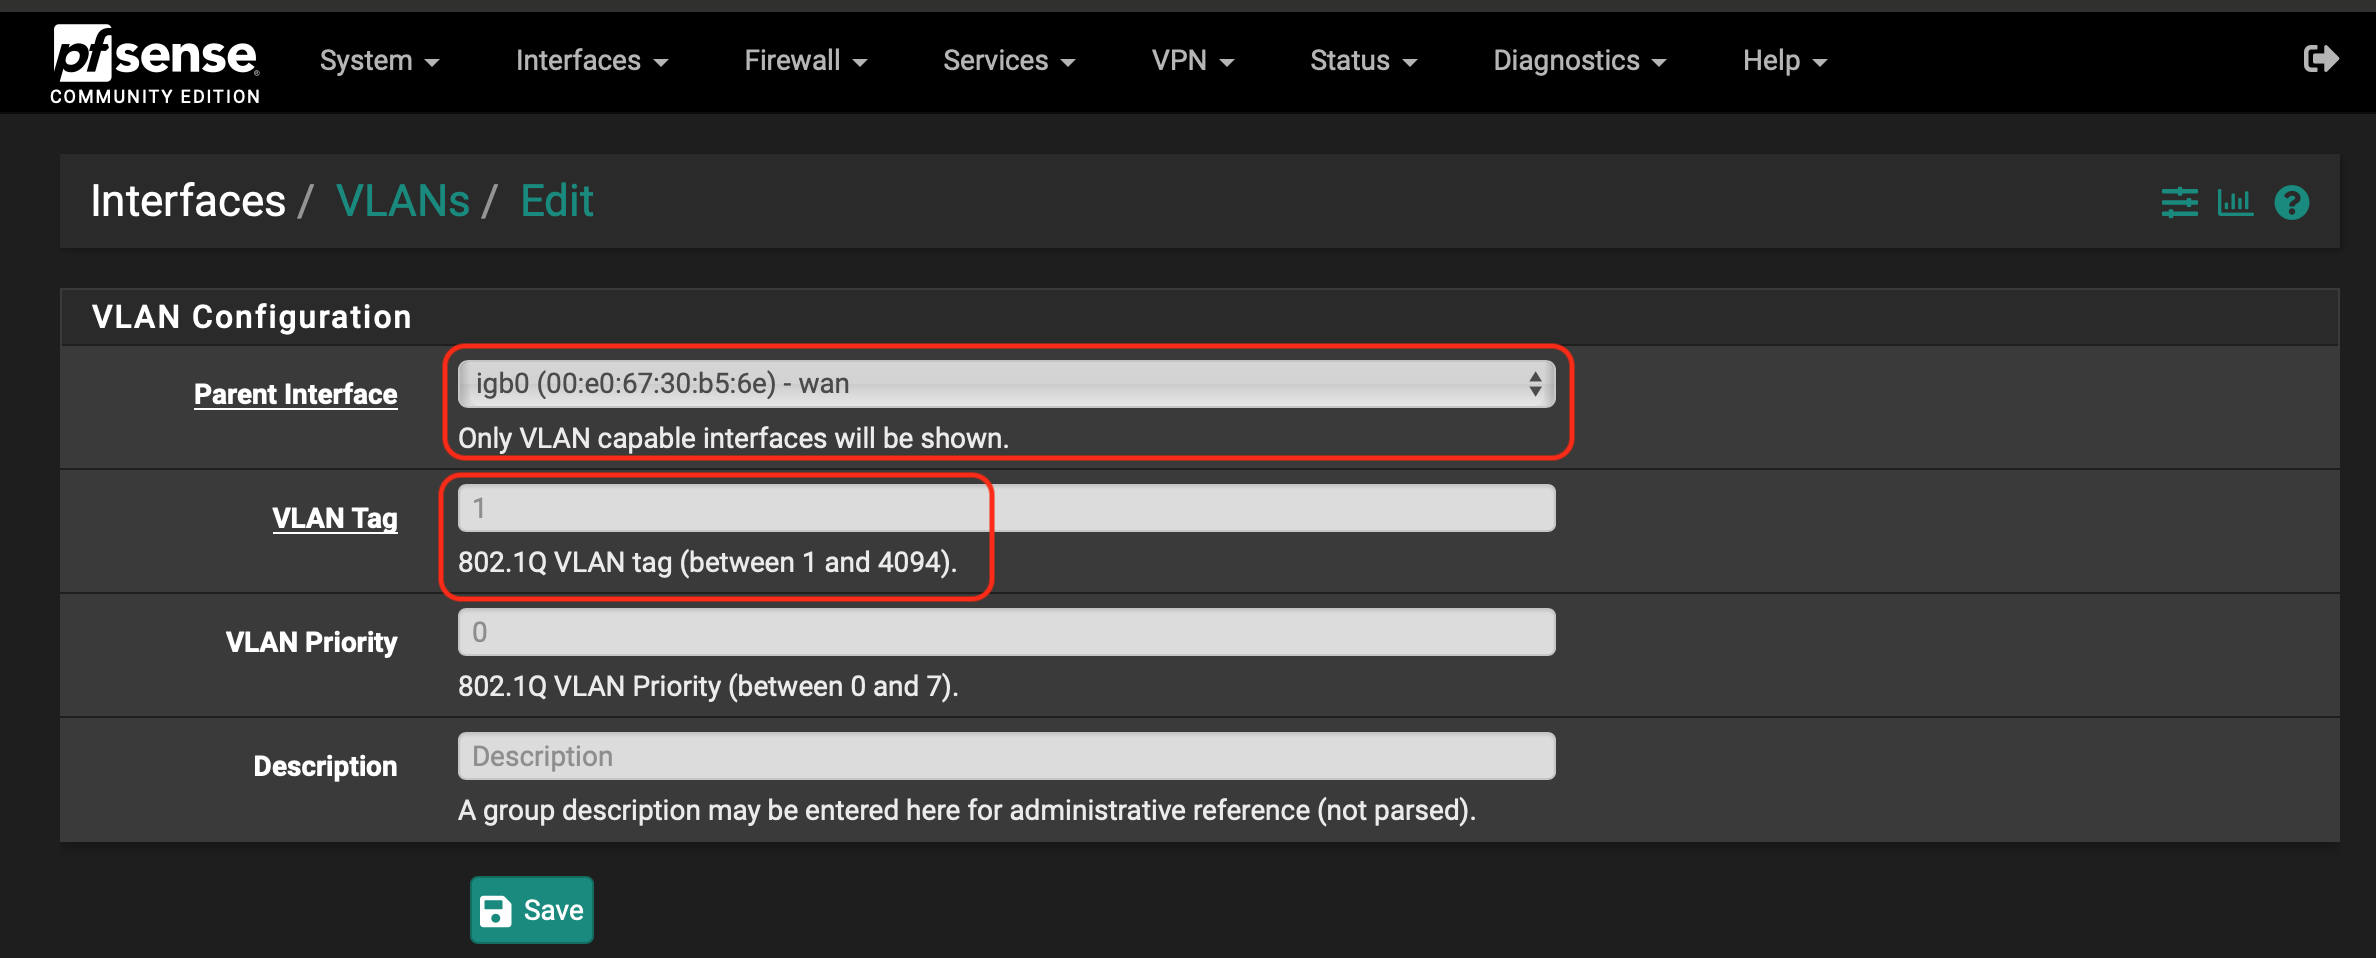
- Make the following configurations:
- Choose the interface the VLAN will be connected to (lan most likely)
- Add a unique VLAN ID number (any number between 1 and 4096)
!
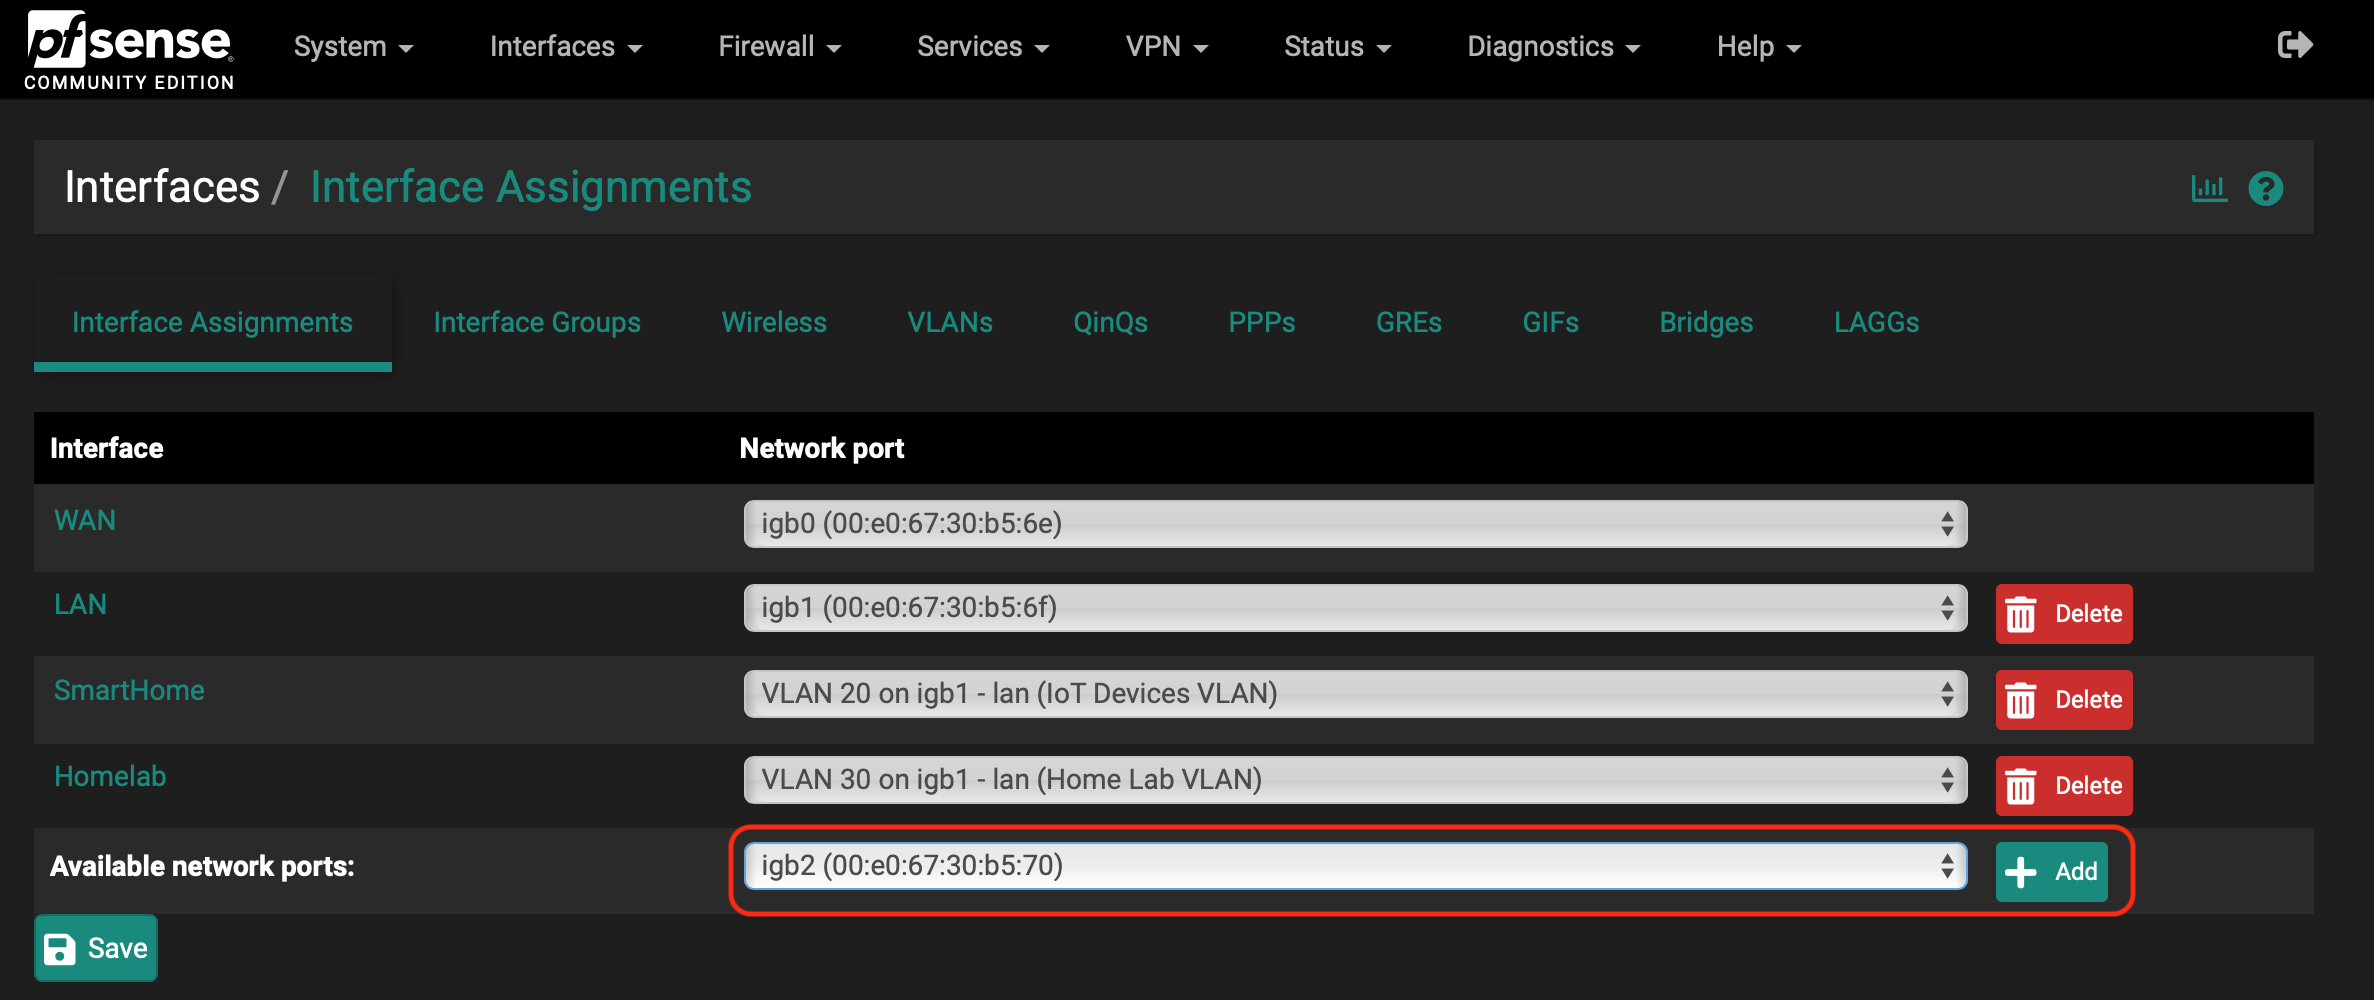
- Navigate to Interface -> Assignments
- Select the VLAN from the drop-down
- Click Add
!
PFSense - Interface Configuration
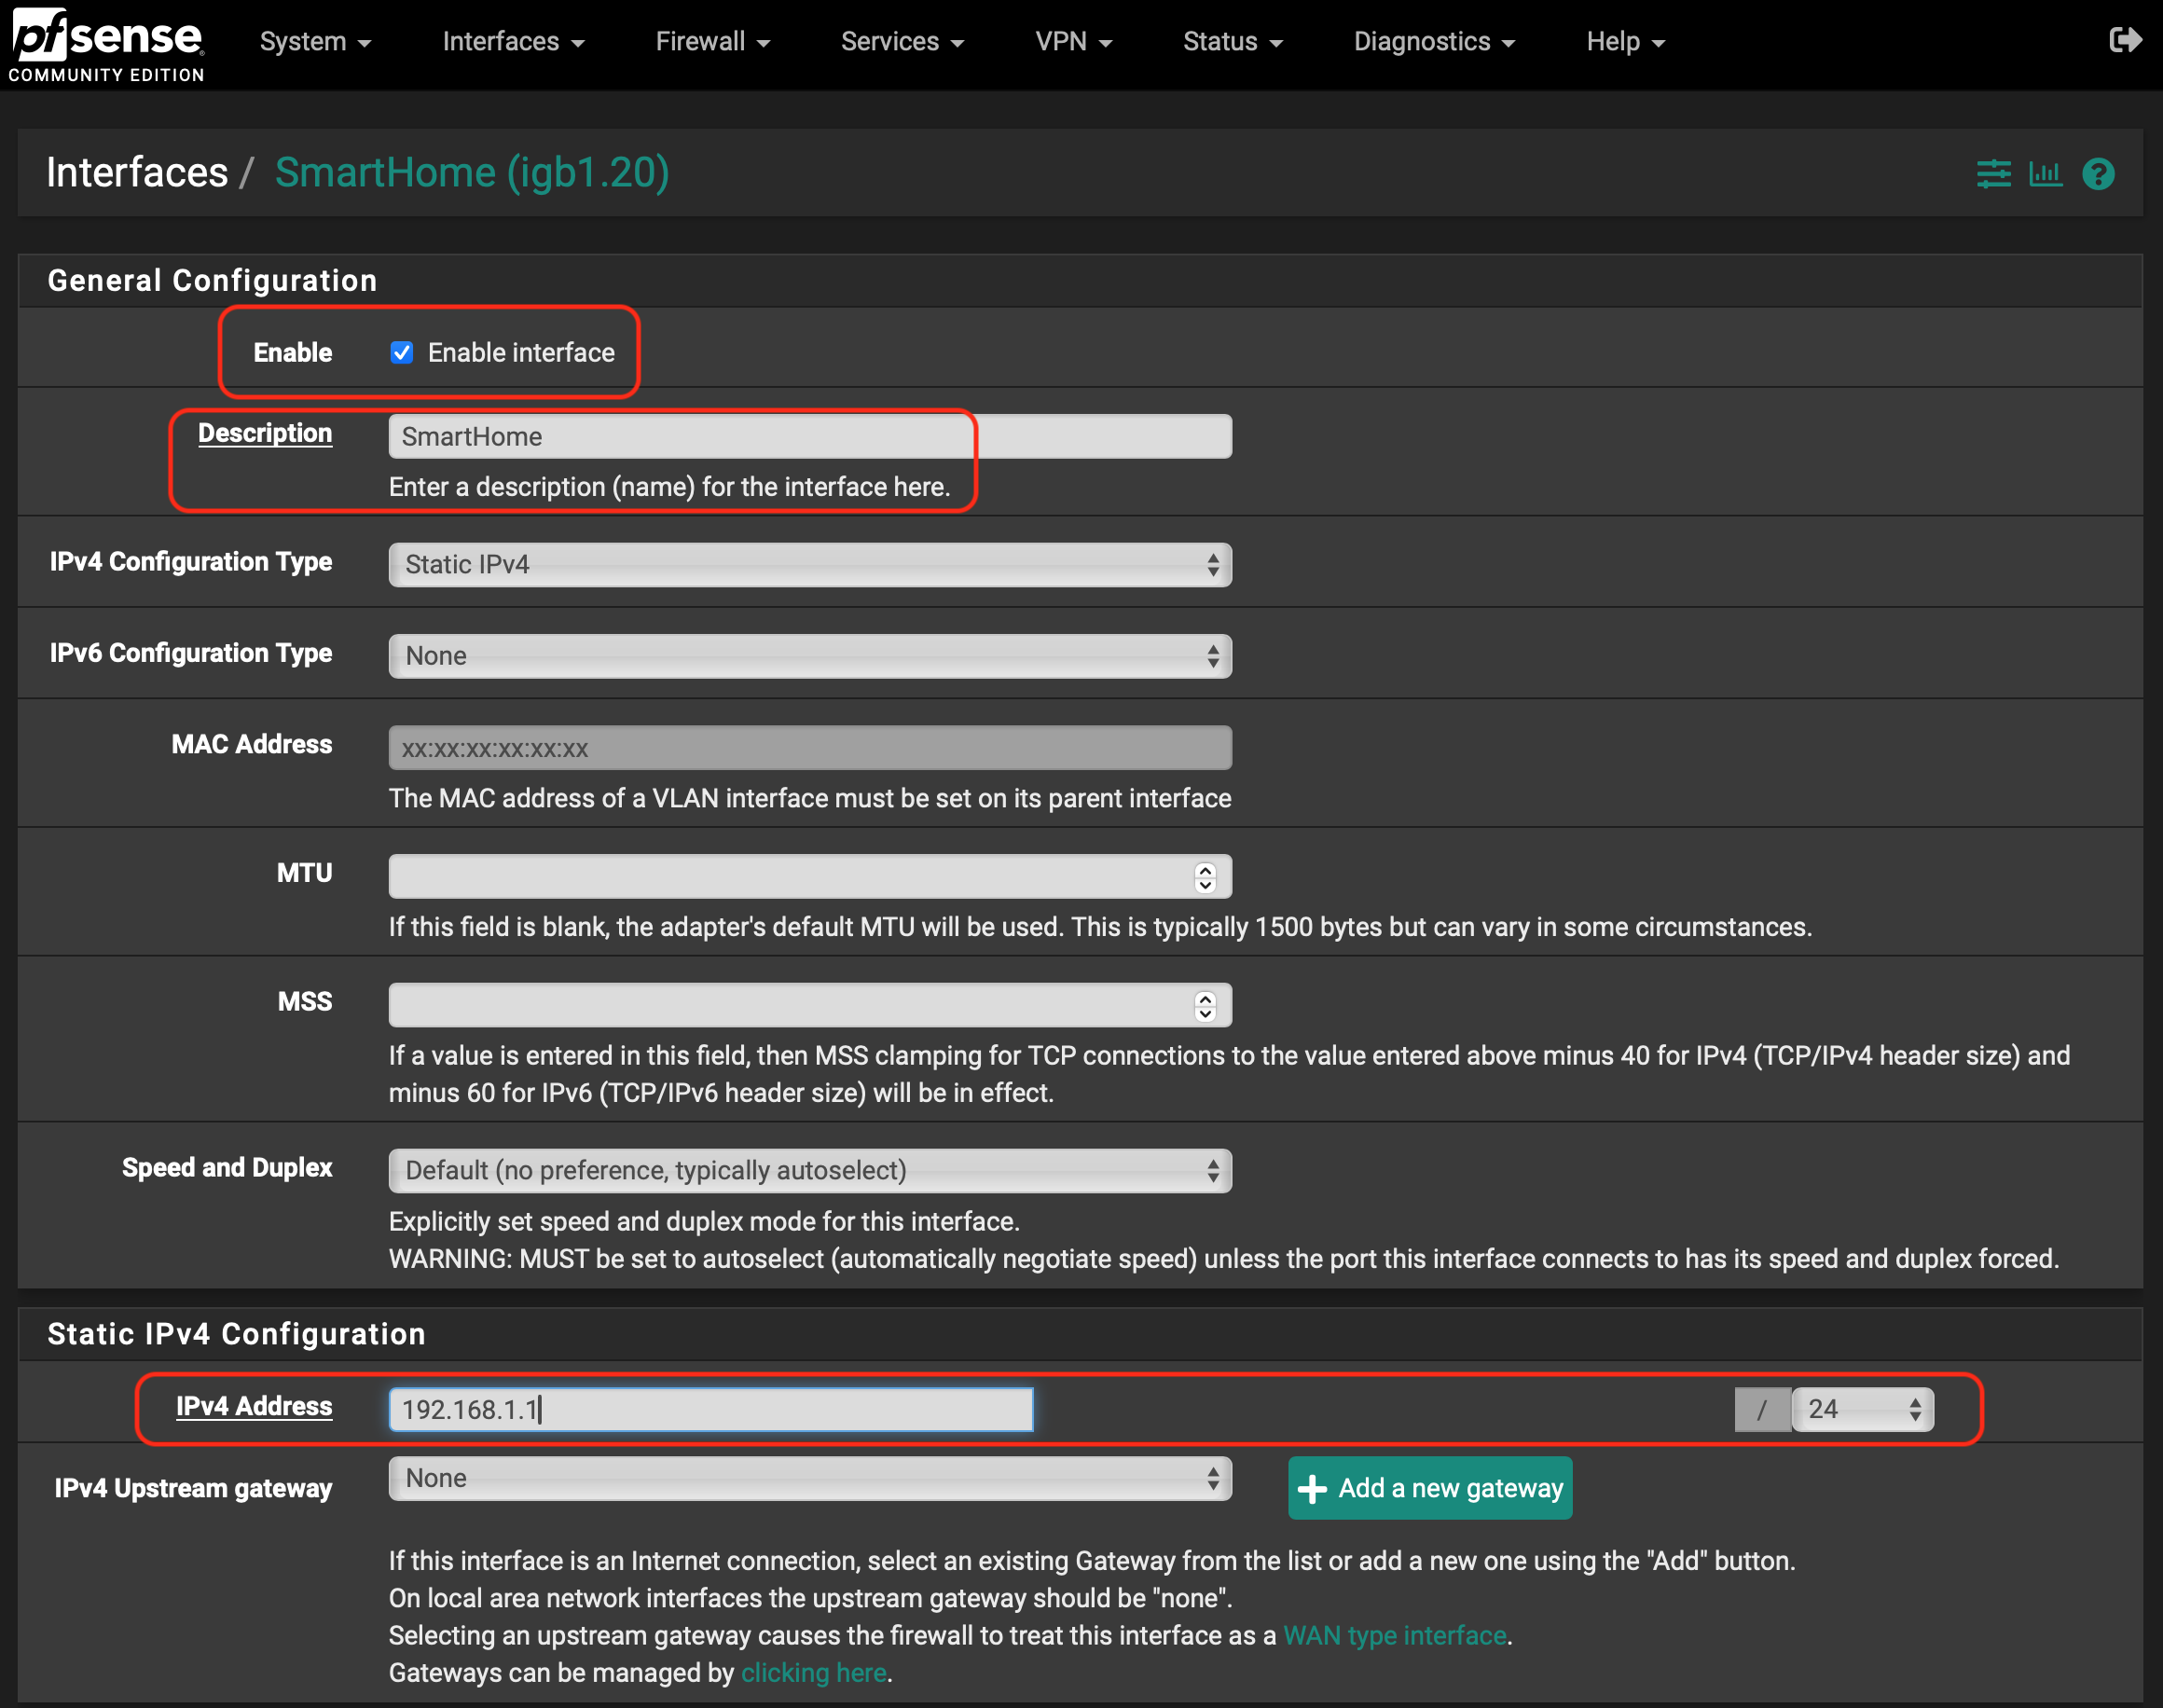
- Navigate to Interfaces -> VLAN Interface to edit
- Make the following configurations:
- Enable the Interface
- Under static IPv4, set the IP address that you want the gateway/router to be
!
PFSense DHCP Server
- Navigate to Services -> DHCP Server
- Select the interface you want to configure
- Make the following configurations:
- Enable the DHCP Service
- Select the IP address range that the DHCP Server should hand out to new clients/devices
- Add DNS server(s) the DHCP should hand out to new devices/clients
- Add Static Mapping for any device you do not want the IP address to change (should be outside of range in step 3.2)
- Enter MAC Address of the device
- Enter the IP Address the device should have
- Give it a hostname and description
PFSense - Firewall Setup for VLANs
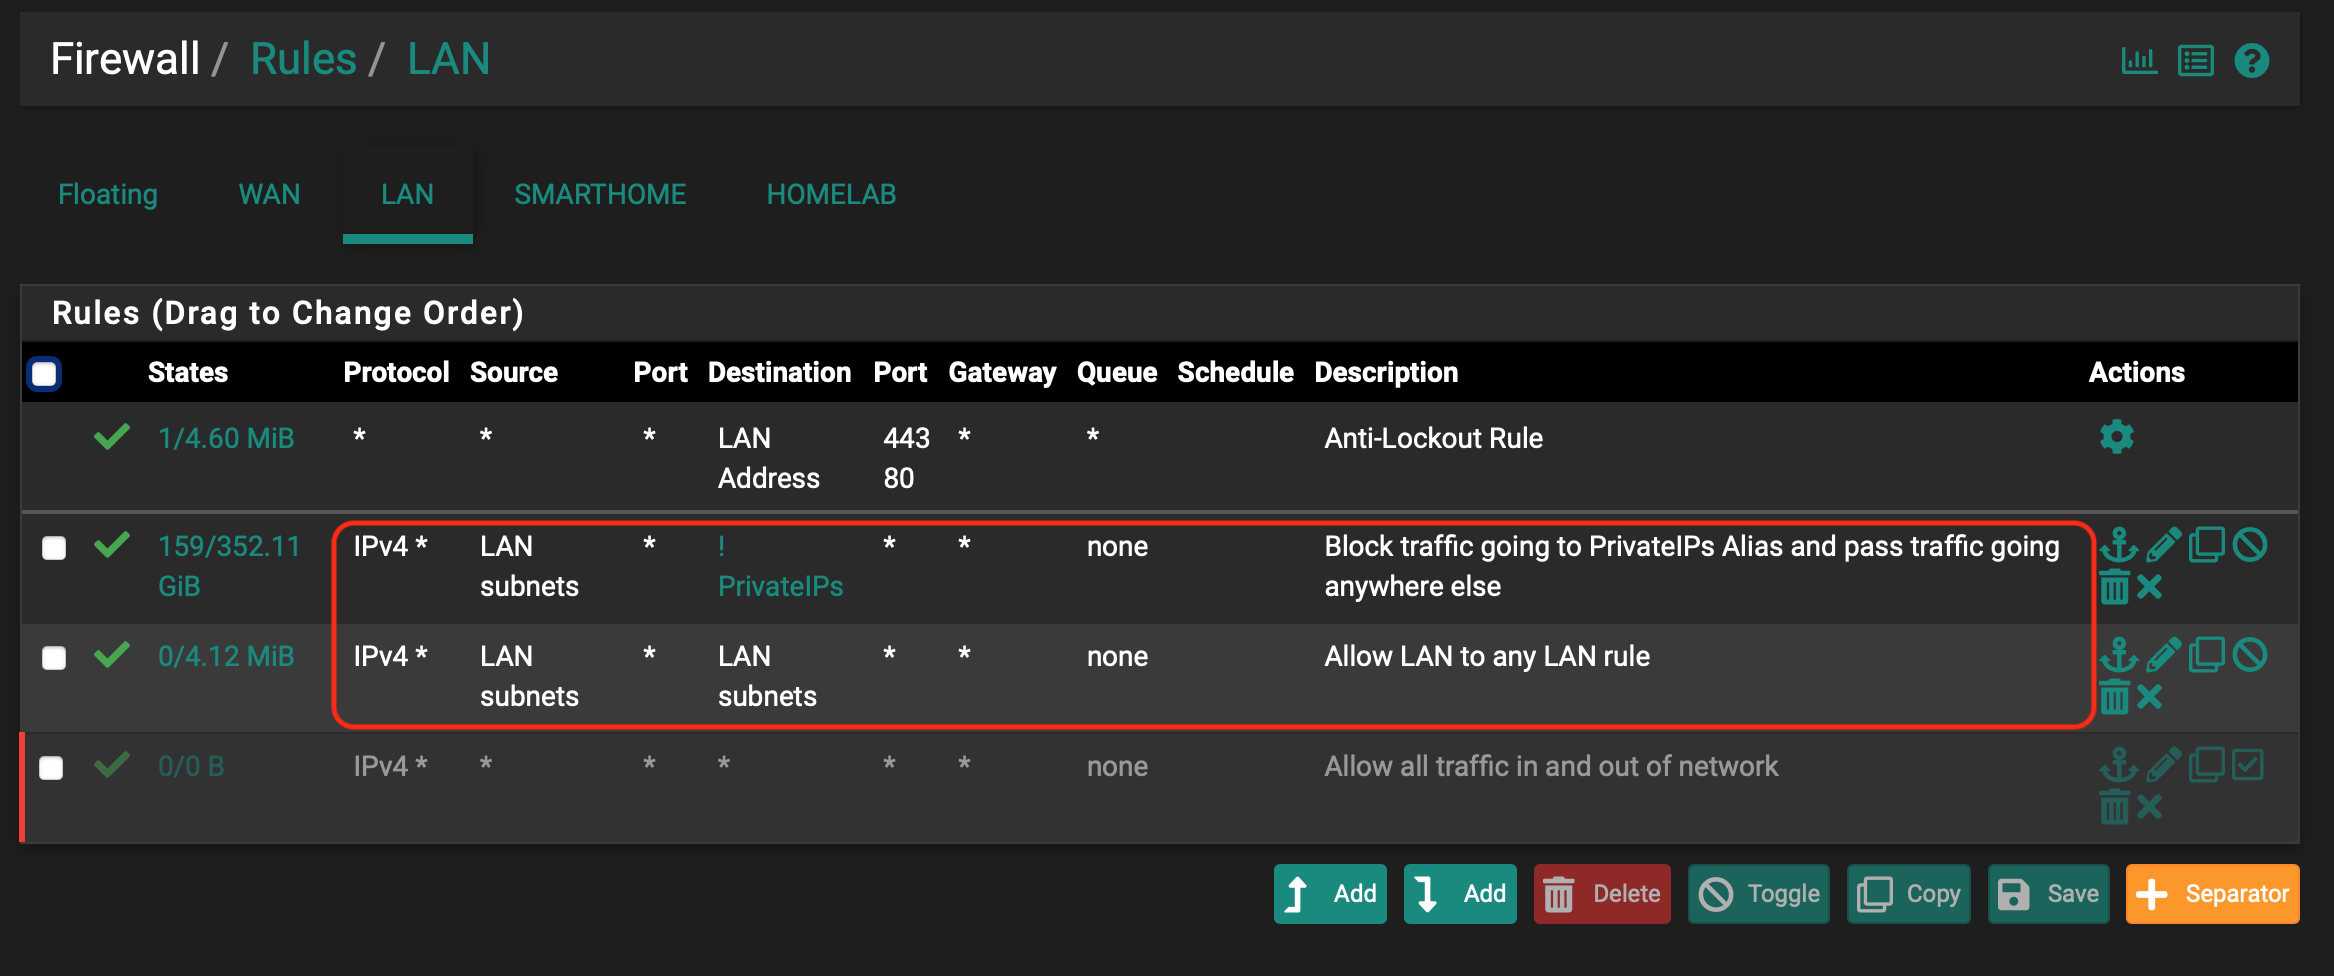
This firewall setup will be to prevent traffic from one VLAN from having any access to traffic on a separate VLAN.
- Navigate to Firewall -> Rules
- Set VLAN interface firewall rules to the following:
!
Set Up VLAN on TP-Link Omada Switch
This setup is for a specific device but should be relatively similar to most consumer manage switches.
- Log in to switch
- Navigate to L2 Features -> VLAN -> 802.1Q
- Click Add
!
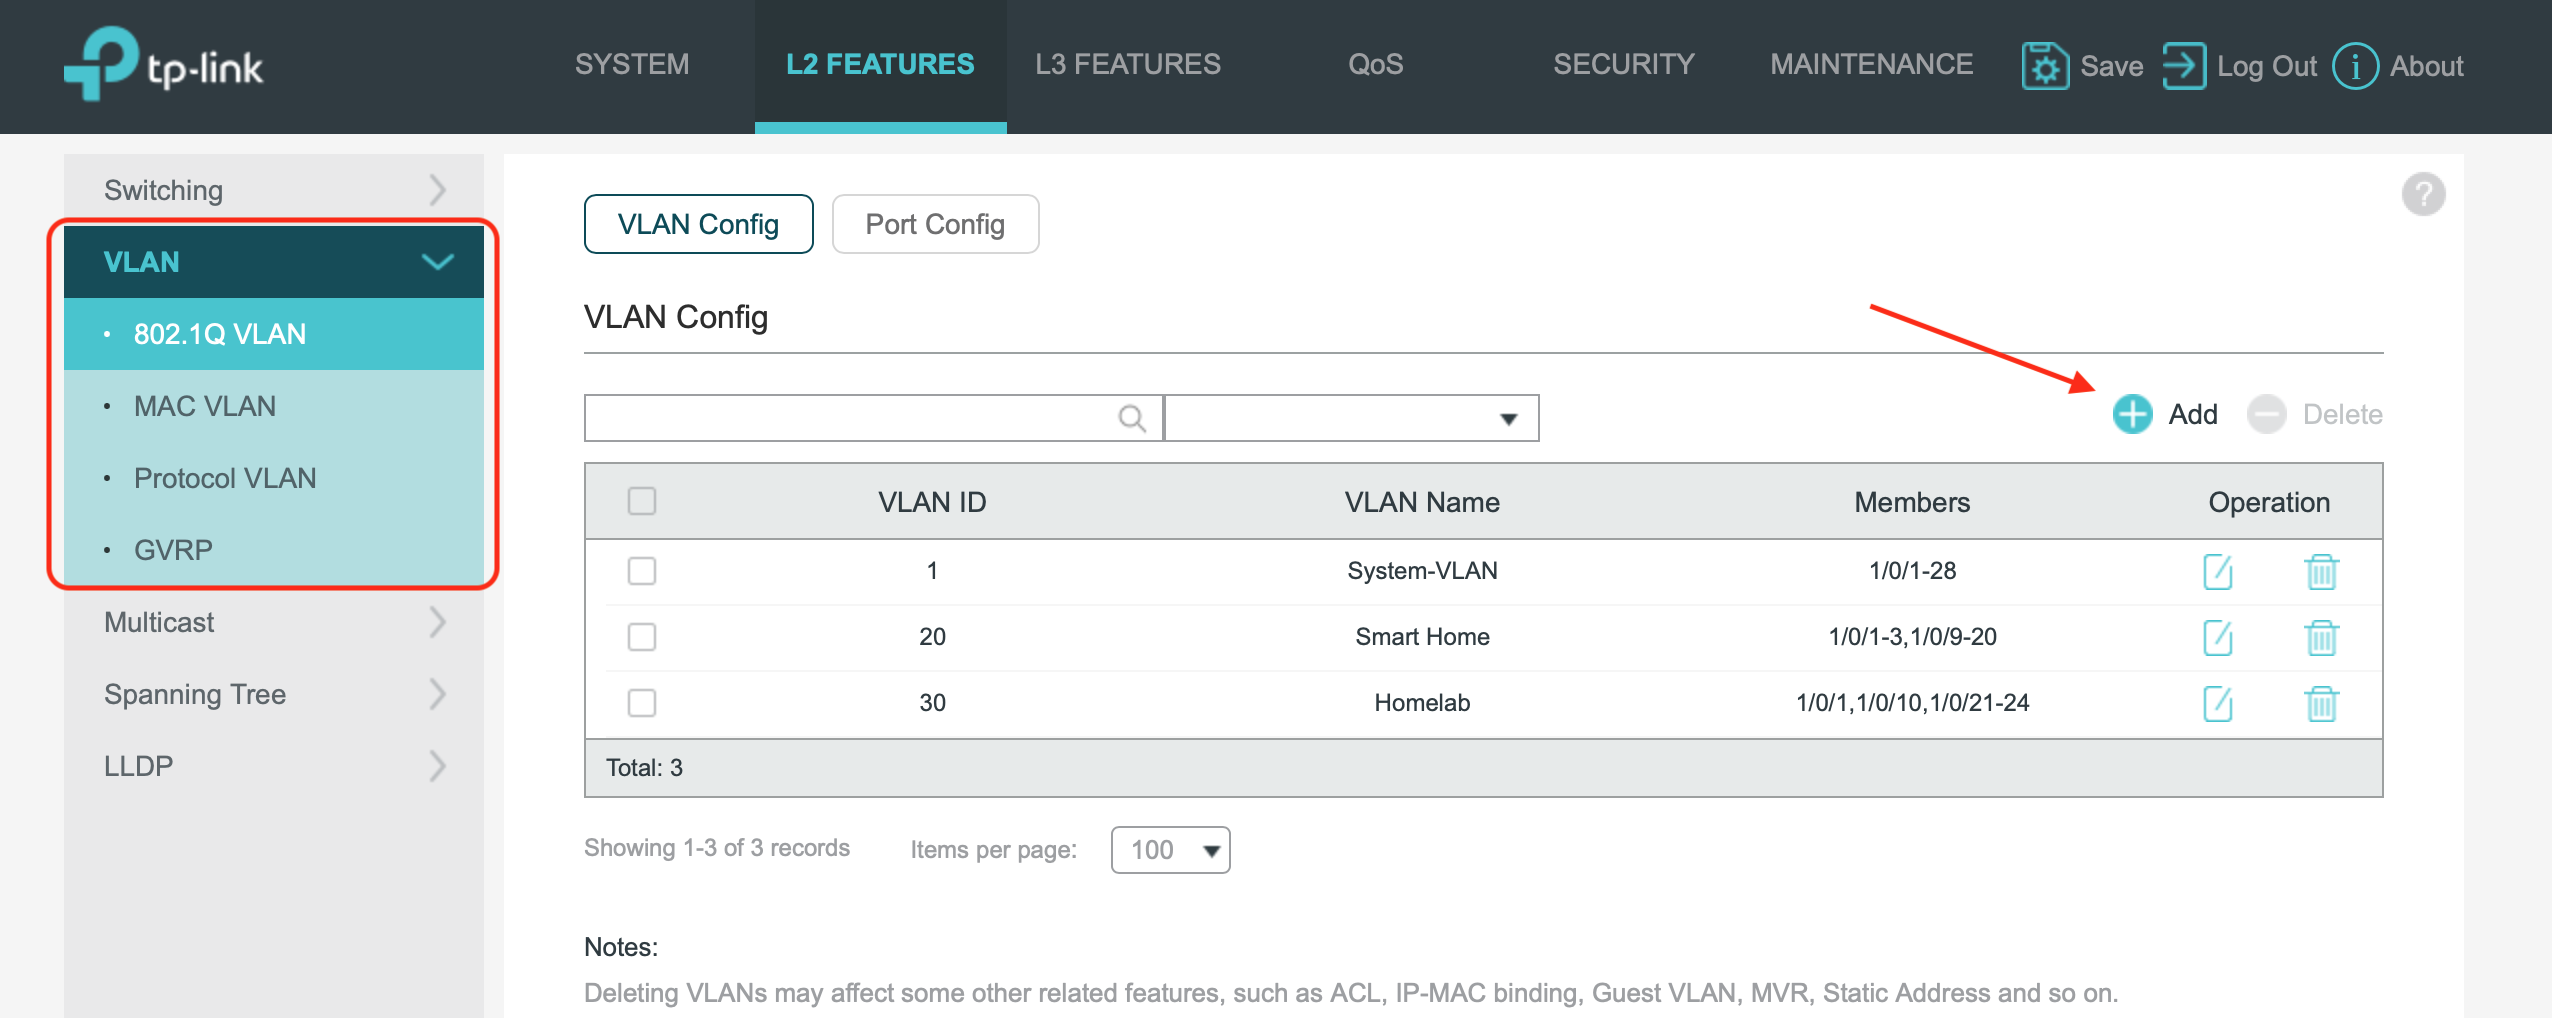
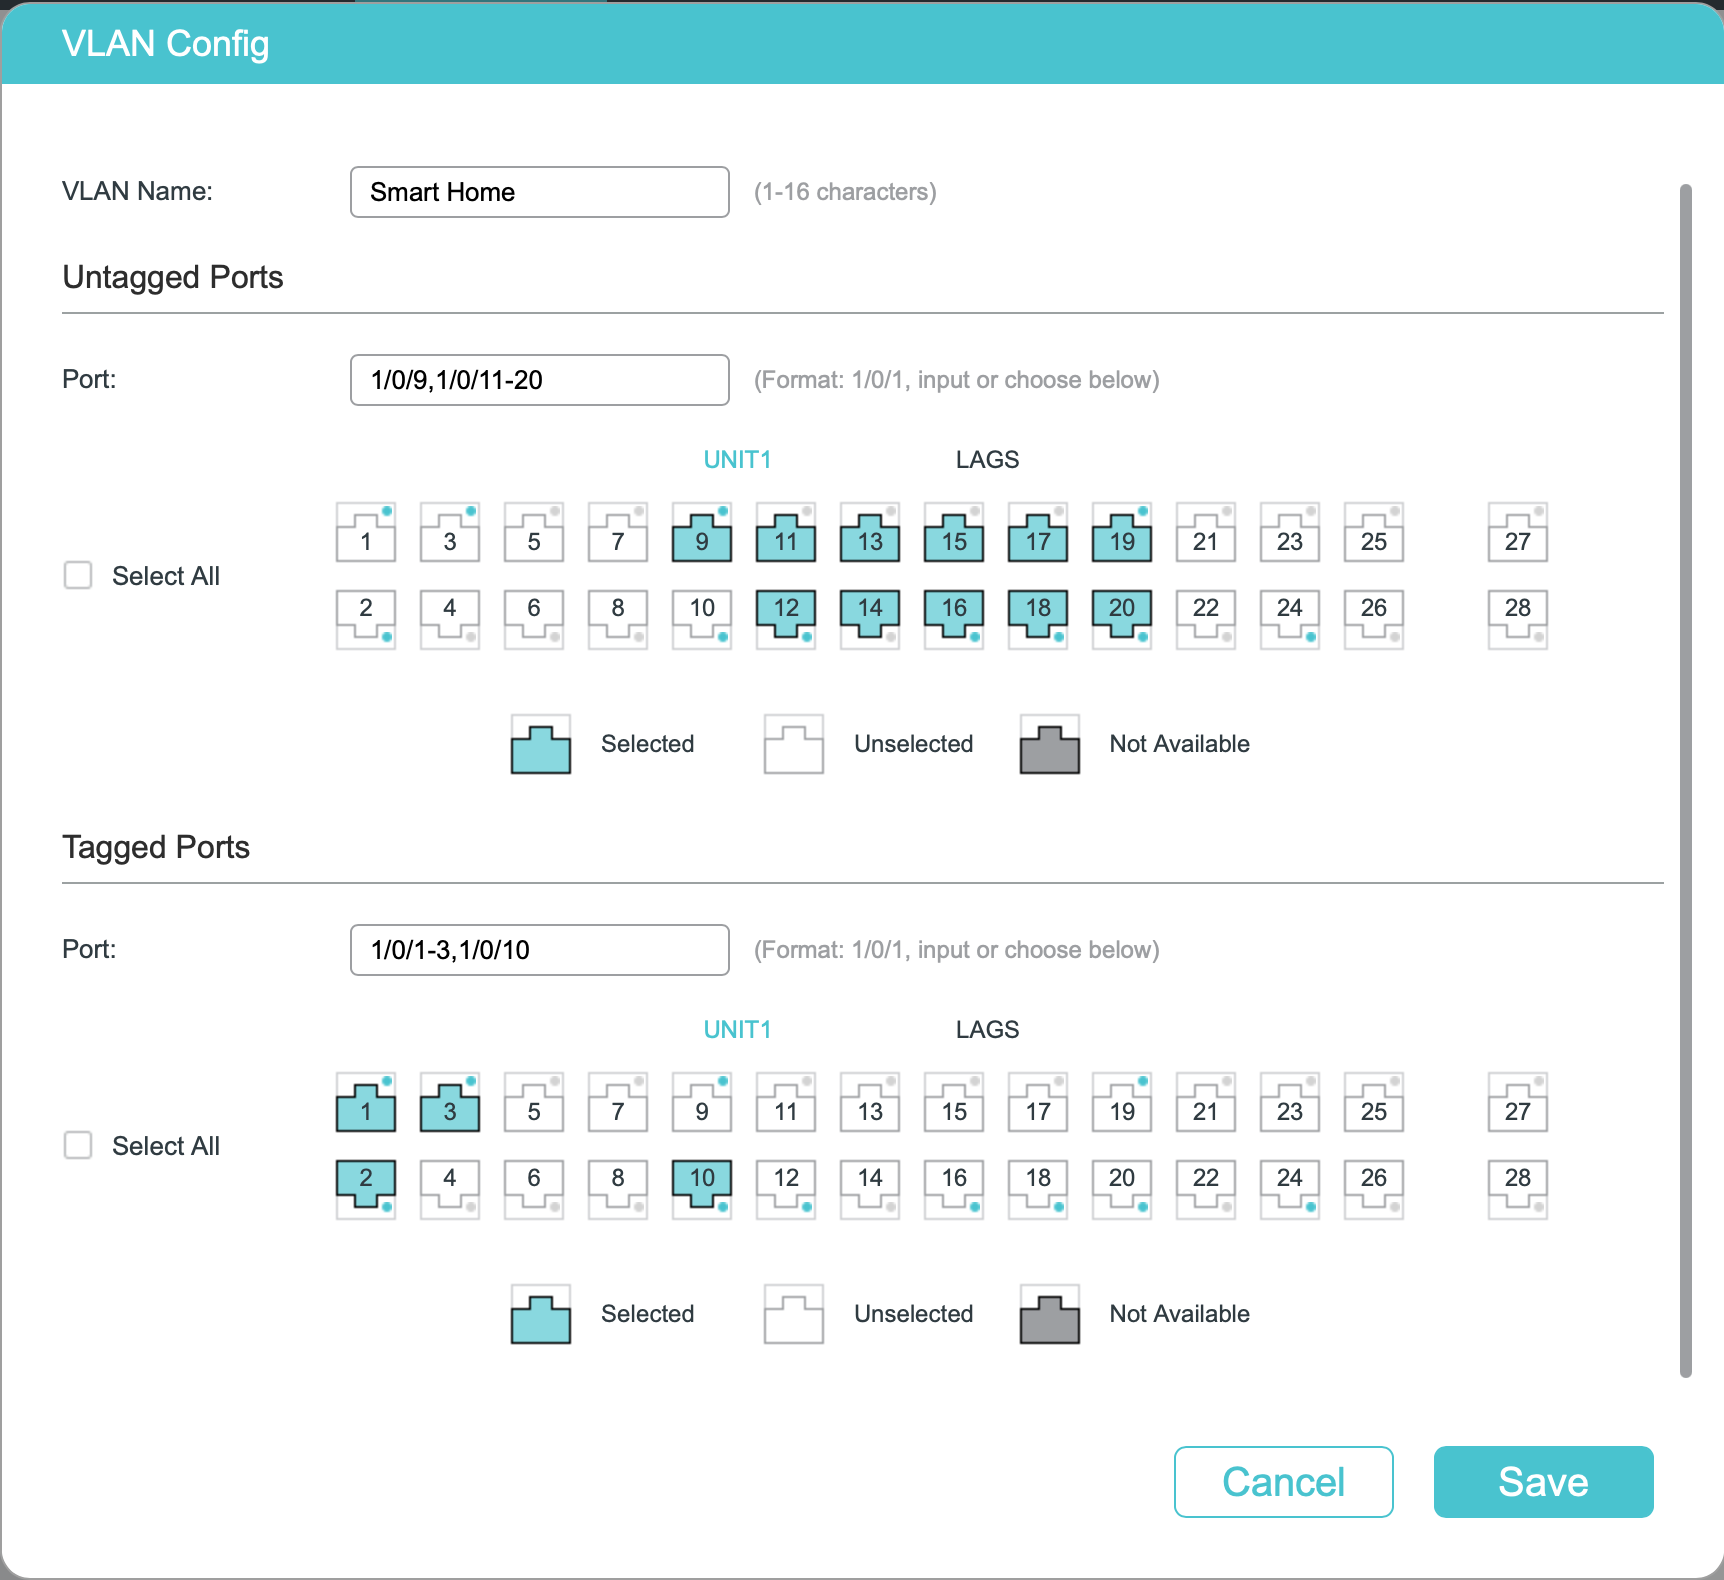
- Make the following configurations:
- Give the VLAN an ID number to match the ID you gave during the creation of the VLAN on PFSense
- Name the VLAN
- Select ports for untagged traffic
- Select ports for tagged traffic
!
Extra - Add a Wireless Network to a VLAN
If you plan to have wireless devices connecting to one of your new VLANs, use the following steps. As mentioned above, these steps are for a specific TP-Link Wireless Access Point (WAP) but should be similar to other consumer WAPs.
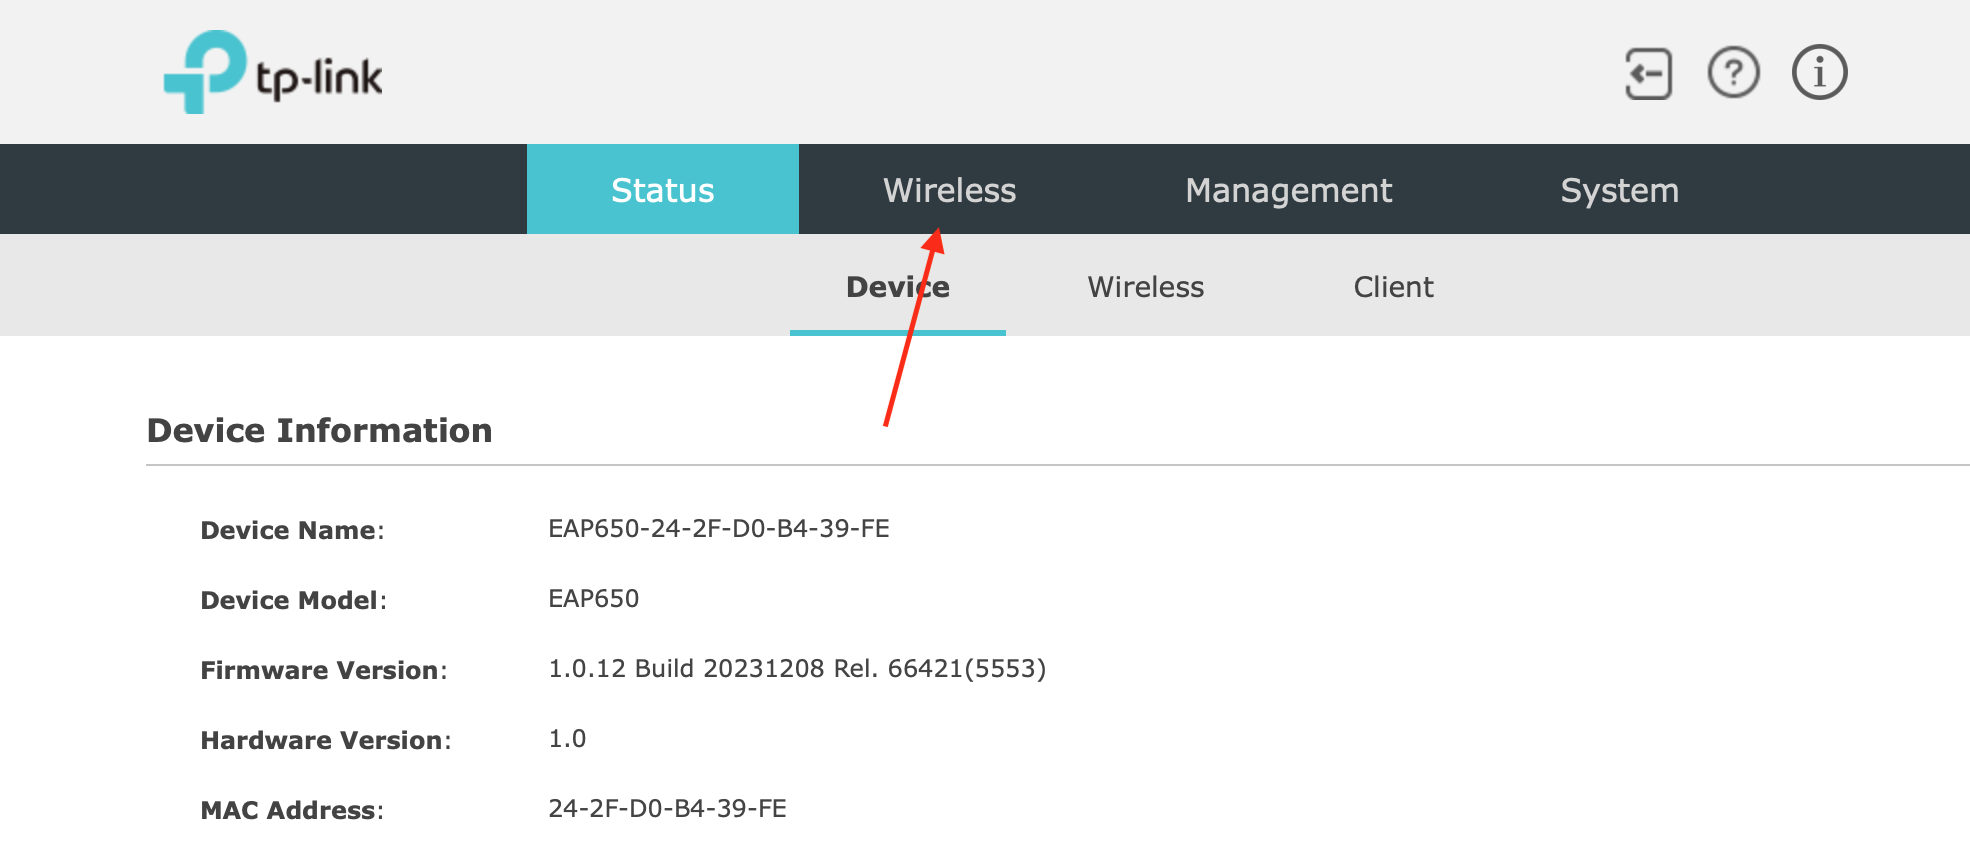
- Log in to WAP
- Navigate to Wireless
!
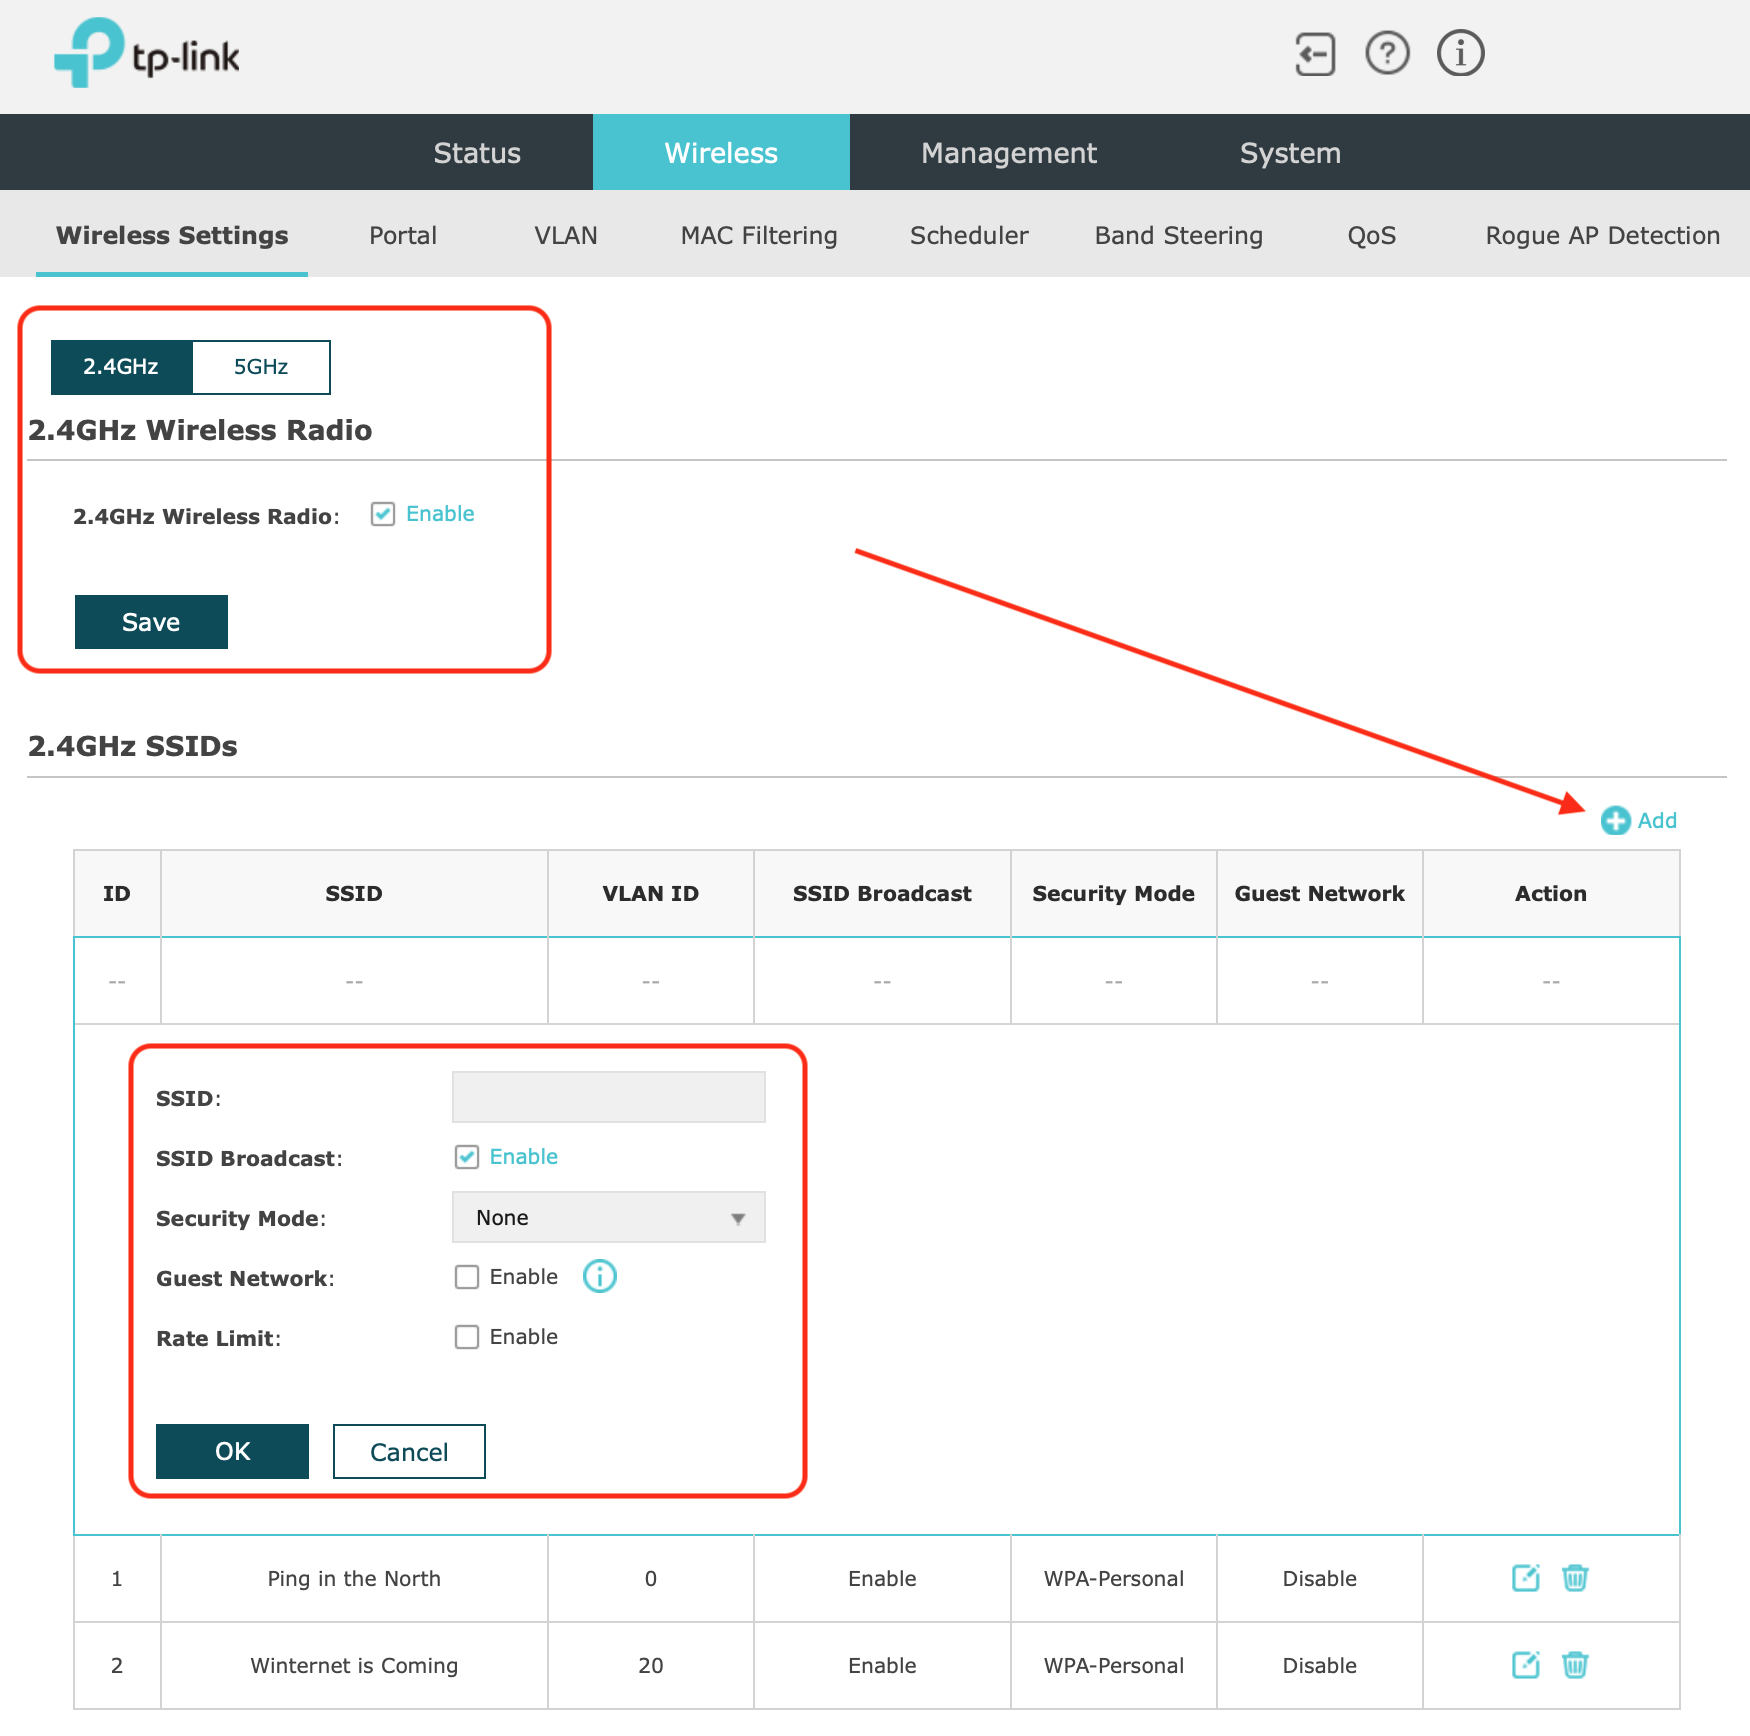
- Check whether you want to add a 2.4Hz or a 5Hz SSID
- Click Add and make the following configurations:
- Name (will be displayed on devices when searching for a wireless network)
- Security type
- Encryption type
- Password
- Make the SSID and Password the same for both a 2.4Hz and 5Hz network so there is no need to log into both separately
!
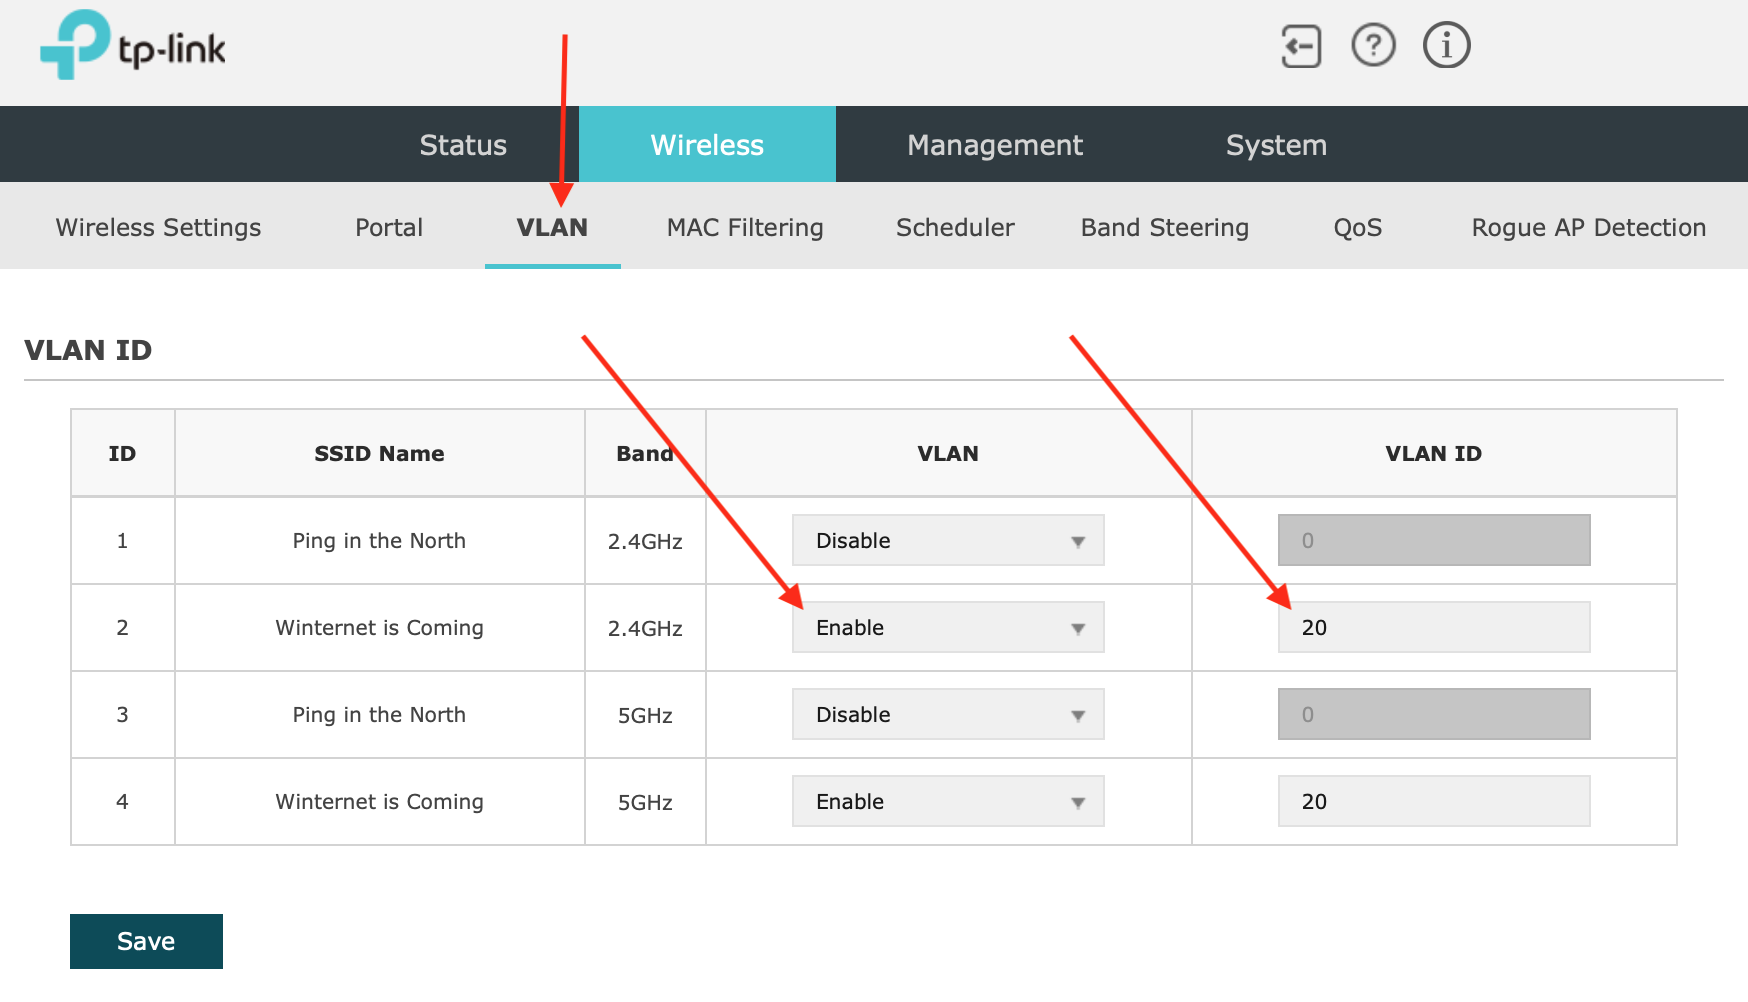
- Navigate to VLAN
- Enable the VLAN for the SSID
- Add the VLAN ID that matches what was set up in PFSense
- The port the WAP is plugged into the on the other switch will need to be tagged with the VLAN ID (see previous section)
!
What Did I Learn?
- VLAN Creation
- Tagged vs. Untagged VLAN Traffic
- Basic Firewall Rules
- DHCP Server Setup